Archive for the ‘I made this’ Category

Illuminated, Interactive ‘Skirt Full of Stars’ – Part 2

Thursday, February 25th, 2010

Update: A tutorial with instructions to make your own Skirt Full of Stars is now posted at StarSkirt.PolymathDesignLab.com

Now you can see the Skirt Full of Stars in action!

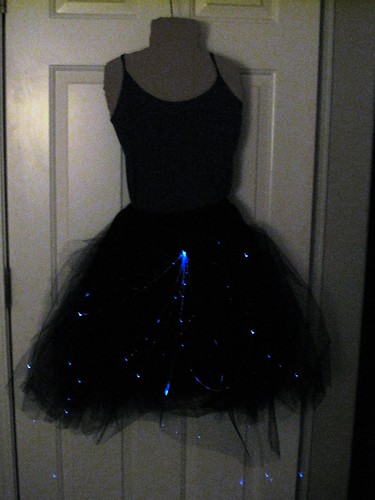
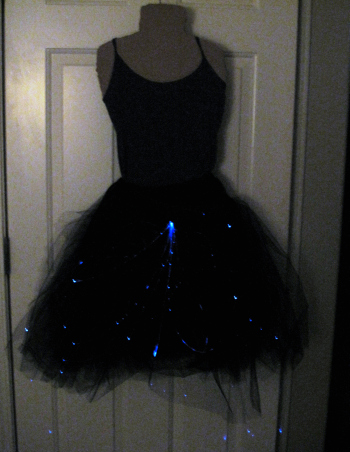
In case you haven’t seen my last post about it, this is a hand-sewn tulle wrap skirt with integrated fiber optics and lights that change color in response to the speed and direction of the wearer’s movement.

It uses the Lilypad Arduino platform, developed for integrating electronics into textiles. There’s a purple organza underlayer to the skirt onto which is sewn the Lilypad main circuit board and a power supply, and an accelerometer hangs from a ribbon to allow for freedom of movement. The Lilypad receives the measurements of the accelerometer’s movement, and translates them into color output for the tricolor LEDs around the waistband of the skirt.

I used sparkle fiber optic cable to cut the harsh quality that you can get when using LEDs and distribute the light more evenly throughout the skirt. In previous prototypes I had simply created a line of LEDs swirling around the skirt, and this makes for a far more subtle and wearable effect.

I have to say, getting decent video of this skirt was quite a challenge! Too much light and the fiber optics didn’t show up on camera, too little and nothing showed up at all. Even this isn’t an accurate representation of what it looks like in person – the camera mostly just picks up the points of light from fiber optics pointed directly at it, where in person you can see them all around the skirt. But hopefully it at least gives a decent idea of how the whole thing works…

Want your own?

It looks like I’ll be making another of these soon, so I plan to take more photos of the construction process and post the instructions here as I go.

If you’re not feeling the yearning to jump into making wearable electronics yourself but you still want your own, send me an email at shannon@polymathdesignlab.com. I had a lot of fun creating this and would be thrilled to make some as custom projects.

Skirt full of stars

Bookmark and Share

Illuminated, Interactive ‘Skirt Full of Stars’ – Part 1

Friday, February 12th, 2010

Skirt full of stars - in lightSkirt full of stars - in half dark

Hooray, Hooray – it’s finally done!

Introducing my ‘Skirt Full of Stars’ – an interactive, illuminated skirt using the Lilypad Arduino – a microcontroller board designed for textile use.  The skirt incorporates an accelerometer to measure the wearer’s movement, and the ’stars’ change color based on that movement.

I’ve been working on this skirt for around a year now – you may remember the video I posted last spring of my proof of concept circuit. In the time since then I’ve created two other prototype skirts, which were great steps in my learning but didn’t end up working quite as I’d hoped. This one, however, made it though a full real-world test wear at last week’s Bassnectar concert with flying, or at least dancing, colors.

Here’s what that circuit from the video ended up turning into:

Skirt Full of Stars - the circuit

And here it is showing a different color as I move the accelerometer:

Skirt Full of Stars - circuit with motion

I sewed the circuit into a handmade tulle wrap skirt, then attached fiber optics to each of the LEDs and wove them through the lower layer of tulle.

I’m hoping to get some better pictures and some video of it this weekend, so stay tuned for more details.

Bookmark and Share

Spirosketch is ready!

Wednesday, August 5th, 2009

Spirosketch jewelry set

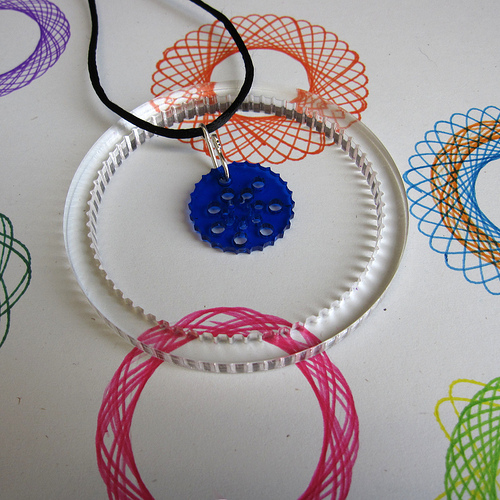
After months of tweaking my design, I was finally able to launch my Spirosketch jewelry sets last weekend at Urban Craft  Uprising, and I’m so excited!

Spirosketch action shotThe Spirosketch set is a bangle bracelet and necklace, and also a fully functional drawing tool/toy. I’ve always been a fidgeter and doodler, and early this year I had the thought “Wouldn’t it be neat if there were a spirograph that you could wear and take around with you all of the time?” And then I set out to make it happen.

The first hurdle I faced was setting up the gearing in a way that wasn’t horribly uncomfortable around a wrist.  As you can see in the picture above, I ended up with an inner surface on the bracelet that is mostly smooth, with just enough teeth to keep things running cleanly when using it to draw.

Then I set my energy to coming up with an attractive design for the pendant. I wanted to make sure that there were a variety of hole positions so that it could create different designs, but I didn’t want to use the traditional positions from the original spirograph. I also needed to make sure that the holes were large enough to allow the tip of a standard pen to touch the paper through the 3mm thick plastic.

The largest number of iterations came in this step. I ended up with some rejected designs that looked sadly like checkers-pieces, lots that could only be used with super-fine-point pens, and others that looked and worked okay but were too symmetrical so all the holes made the same pattern. Eventually I hit on my final design, which I think does a pretty good job of being attractive and also functional – the innermost holes are just to continue the pattern, and won’t work with most pens, but most of them do work – as you can see from the variety of patterns made in the drawings on the top picture.

Want one? They’re available through my Ponoko showroom or my Etsy shop.

Bookmark and Share

Crafty Wonderland!

Thursday, May 7th, 2009

Triplet Rosette necklaceOh gracious, my poor neglected blog! Techshop Portland got their laser cutter, and ever since then I’ve been spending most of my spare moments over there, and not writing much of anything longer than a tweet! (And yes, if you do want to hear from me a bit more often, you can do so by following @Spiralshannon, or subscribing to my twitter rss feed.)

So, anyway, things have been pretty exciting over here. I’ll be selling at Crafty Wonderland this Sunday – my first craft fair! I have a new set of designs based on work I’ve been doing with Context Free Art - software that allows you to create images by writing algorithms, and which  is pretty easy to learn if you have even the most basic programming background (which is all I have… I’ve done the barest touch of javascript coding, but I taught the “Advanced BASIC” class at a computer camp back in college.) I’ve only photographed one item out of the new set, and it was selected to appear in the promotional email for this weekend’s show, which has me a bit giddy.

There’s more to tell, but honestly I think I’ll have a better chance of getting back to posting regularly if I don’t force myself to sit here and write about it all right this minute. Besides, I have to finish getting everything ready for the craft show! So, if you’ll be in Portland on Sunday, come check out the show (11am to 4 pm at the Doug Fir Lounge, 830 E Burnside) and get to be among the first few people to see the rest of the new pieces. If not, sit tight and I’ll start posting them next week, and I promise I’ll be back to write more soon!

Bookmark and Share

The prototype video

Monday, March 16th, 2009

I made it over to have my sister take some video of the functioning circuit prototype tonight:


Lilypad Arduino prototype circuit from Shannon Henry on Vimeo.

(for more about what you are watching, see:  A working prototype!)

Bookmark and Share